自建本地服务器汇总篇(Ubuntu Server)

  • 用途:博客发布、文件存放等

本文按时间顺序展开,从安装server开始,到能够用SSH登陆结束。

本文并不是手把手教程,仅是记录了一个大致流程,谨慎观看。

本文是一个合集,链接为内容,简介为框架。建议食用方法:先大体看完全文,然后再按顺序展开操作。

Ubuntu Server的安装

  建议关闭网络连接,对没错,就是拔网线,或者准确的说是,关闭公网的连接。当然你也可以先设置个强度大、不容易破解的密码,至于为什么,请看文末

安装参考网站:

  系统后的固定IP设置”

1
2
3
ip addr  #Show addresses assigned to all network interfaces. 展示本机IP等信息
ip neigh #Shows the current neighbour table in kernel. 展示网络邻居IP
ip route #Show table routes. 展示路由信息

  通过ip addr查看本机IP地址,ip route查看路由地址

  修改配置文件

1
sudo vi /etc/netplan/xxxx.yaml 
1
2
3
4
5
6
7
8
9
10
11
12
13
14
15
network:
version: 2
ethernets:
# 网卡型号,可通过`ip addr`查看
enp37s0:
# 关闭dhcp
dhcp4: false
dhcp6: false
# 可同时设多个,对于 IP4 每个值为 "IP地址/掩码长度"
addresses: [192.168.123.4/24, 'fe80:0:0:0:0:0:c0a8:64d3']
# 网关
gateway4: 192.168.123.1
# 设置 DNS
nameservers:
addresses: [192.168.123.1]
1
sudo netplan apply # 完成修改后执行命令使配置生效

Git bash安装

  Windows直接安装exe文件就行了,一路点到底就可以。放个官网链接

  安装完成,右键点空白区域,有“Git Bash Here”选项,点开就有终端了。

另外不用gitbash也可以,只要是能够远程登录的终端就行,Xshell之类的,Windows CMD也可以

  详细教程就不放了。下文也有参考文章可以看看。


SSH配置

  下文是整个步骤流程概括,可作参考,第一篇内容大体为ssh的安装和配置文件的编辑(/etc/ssh/sshd_config),全在服务器端完成;第二篇内容介绍了SSH中密钥的部分,服务端和客户端都有参与。两篇需要结合看。

1
2
3
4
5
6
7
8
9
10
11
12
13
14
15
16
graph LR
a((客户端))--生成-->b[SSH私钥]
b[SSH私钥]--提取-->c[公钥]
c[公钥]--拷贝-->d[服务器]
d[服务器]-->e[开启私钥登录]

f{私钥登录}--no-->c[公钥]
subgraph 验证私钥登录有效
e[开启私钥登录]-->f{私钥登录}
end
subgraph 验证密码登录无效
f{私钥登录}--yes-->g[关闭密码登录]
g[关闭密码登录]-->h{密码登陆}
h{密码登陆}--yes-->g[关闭密码登录]
end
h{密码登陆}--no-->i([SSH基础配置结束])

简要流程:客户端生成SSH私钥,提取公钥,密码登陆服务器,拷贝公钥给服务器,编辑sshd_config开启私钥登录,退出,私钥登陆,验证私钥登录有效,关闭密码登录,退出,密码登陆,验证密码登录无效。然后适当关闭一些选项以提高安全性。

大体印象:SSH的配置基本上都是编辑sshd_conf,该文件在/etc/ssh/目录下
。建议阅读官方文档(见下方链接)。

SSH安装及配置(英文)

  按这个介绍来安装、配置,服务器应该很安全0.0

公私钥的使用(英文)

  客户端生成SSH私钥,提取公钥,将公钥传给服务端。

大体流程(中文参考)

  这篇文章可作参考:

  • [SSH配置公钥登录]: https://zhuanlan.zhihu.com/p/89872671 “(作者:镜子)”

    ​ 再做补充:

    ​ 可以指定公私钥的加密强度,默认2048bit,这里设置成4096bit,可以更难被暴力破解。

1
ssh-keygen -t rsa -b 4096

  个人认为,“本地制作公私钥,然后拷贝到服务器”是一种更为安全的方法,可以降低私钥泄露的风险:先开启SSH密码登录选项(删掉#),然后拷贝公钥到服务器,SSH密钥登录成功后,再关闭密码登录。

  以下是拷贝命令:

1
ssh-copy-id <username>@<host>

密钥详解

  未来接触软件多了,也许会遇到密钥需要转换格式才能匹配并使用的情况,这时候转换格式就行,不需要再次生成。

下文可作参考,密钥处理(私钥生成、公钥提取、格式转换)及其相关知识:

我的配置文件

  这是仅开启密钥登录的配置,具体就不介绍了,上文的官方文档里需要改动的基础部分基本都有。

  另外由于我在内网中,所以监听端口仍然是22,不过路由器监听的外网端口更改过了。如果你们的服务器在外网中的话,最好改一改默认端口,推荐10000以上,因为10000以内的端口有可能会被本地软件使用,从而造成冲突。

1
2
3
4
5
6
7
8
9
10
11
12
13
14
15
16
17
18
19
20
21
22
23
24
25
26
27
28
29
30
31
32
33
34
35
36
37
38
39
40
41
42
43
44
45
46
47
48
49
50
51
52
53
54
55
56
57
58
59
60
61
62
63
64
65
66
67
68
69
70
71
72
73
74
75
76
77
78
79
80
81
82
83
84
85
86
87
88
89
90
91
92
93
94
95
96
97
98
99
100
101
102
103
104
105
106
107
108
109
110
111
112
113
114
115
116
117
118
119
120
121
122
123
124
125
126
127
#$OpenBSD: sshd_config,v 1.103 2018/04/09 20:41:22 tj Exp $

# This is the sshd server system-wide configuration file. See
# sshd_config(5) for more information.

# This sshd was compiled with PATH=/usr/bin:/bin:/usr/sbin:/sbin

# The strategy used for options in the default sshd_config shipped with
# OpenSSH is to specify options with their default value where
# possible, but leave them commented. Uncommented options override the
# default value.

Include /etc/ssh/sshd_config.d/*.conf

#Port 22
#AddressFamily any
#ListenAddress 0.0.0.0
#ListenAddress ::
ListenAddress 0.0.0.0:22 #监听端口22

HostKey /etc/ssh/ssh_host_rsa_key
#HostKey /etc/ssh/ssh_host_ecdsa_key
#HostKey /etc/ssh/ssh_host_ed25519_key

# Ciphers and keying
#RekeyLimit default none

# Logging
SyslogFacility AUTH
LogLevel VERBOSE

# Authentication:

LoginGraceTime 2m
PermitRootLogin prohibit-password
#PermitRootLogin yes
StrictModes yes
MaxAuthTries 3
MaxSessions 5

PubkeyAuthentication yes

# Expect .ssh/authorized_keys2 to be disregarded by default in future.
AuthorizedKeysFile .ssh/authorized_keys

#AuthorizedPrincipalsFile none

#AuthorizedKeysCommand none
#AuthorizedKeysCommandUser nobody

# For this to work you will also need host keys in /etc/ssh/ssh_known_hosts
HostbasedAuthentication no
# Change to yes if you don't trust ~/.ssh/known_hosts for
# HostbasedAuthentication
IgnoreUserKnownHosts no
# Don't read the user's ~/.rhosts and ~/.shosts files
IgnoreRhosts yes

# To disable tunneled clear text passwords, change to no here!
PasswordAuthentication no
PermitEmptyPasswords no

# Change to yes to enable challenge-response passwords (beware issues with
# some PAM modules and threads)
ChallengeResponseAuthentication no

# Kerberos options
#KerberosAuthentication no
#KerberosOrLocalPasswd yes
#KerberosTicketCleanup yes
#KerberosGetAFSToken no

# GSSAPI options
#GSSAPIAuthentication no
#GSSAPICleanupCredentials yes
#GSSAPIStrictAcceptorCheck yes
#GSSAPIKeyExchange no

# Set this to 'yes' to enable PAM authentication, account processing,
# and session processing. If this is enabled, PAM authentication will
# be allowed through the ChallengeResponseAuthentication and
# PasswordAuthentication. Depending on your PAM configuration,
# PAM authentication via ChallengeResponseAuthentication may bypass
# the setting of "PermitRootLogin without-password".
# If you just want the PAM account and session checks to run without
# PAM authentication, then enable this but set PasswordAuthentication
# and ChallengeResponseAuthentication to 'no'.
UsePAM yes

#AllowAgentForwarding yes
AllowTcpForwarding no
#GatewayPorts no
X11Forwarding no
#X11DisplayOffset 10
#X11UseLocalhost yes
#PermitTTY yes
PrintMotd no
PrintLastLog yes
TCPKeepAlive yes
#PermitUserEnvironment no
Compression yes
ClientAliveInterval 120 #120秒发送一次包确认客户端是否活跃
ClientAliveCountMax 20 #超过20次那么关闭会话,也就是说40分钟不活跃,才会断开连接 ,这样能顾保持较长的连接时间而不至于断开
UseDNS no
PidFile /var/run/sshd.pid
MaxStartups 10:30:100
#PermitTunnel no
#ChrootDirectory none
#VersionAddendum none

# no default banner path
#Banner none

# Allow client to pass locale environment variables
AcceptEnv LANG LC_*

# override default of no subsystems
Subsystem sftp /usr/lib/openssh/sftp-server

# Example of overriding settings on a per-user basis
#Match User anoncvs
# X11Forwarding no
# AllowTcpForwarding no
# PermitTTY no
# ForceCommand cvs server
# PasswordAuthentication no

安全提醒

  到此,服务器基本非常安全了:平时注意私钥不要泄露除去,那么基本没问题。

  放一个近期的log来看看有没有异地登录,一看还真有尝试登录的,不过非常少,一周内只有两个,一个韩国的,在白天尝试登录,另一个是荷兰的,大半夜的来尝试登录。这是换了端口的情况,不换端口,应该会特别多。

服务器ssh被攻击记录

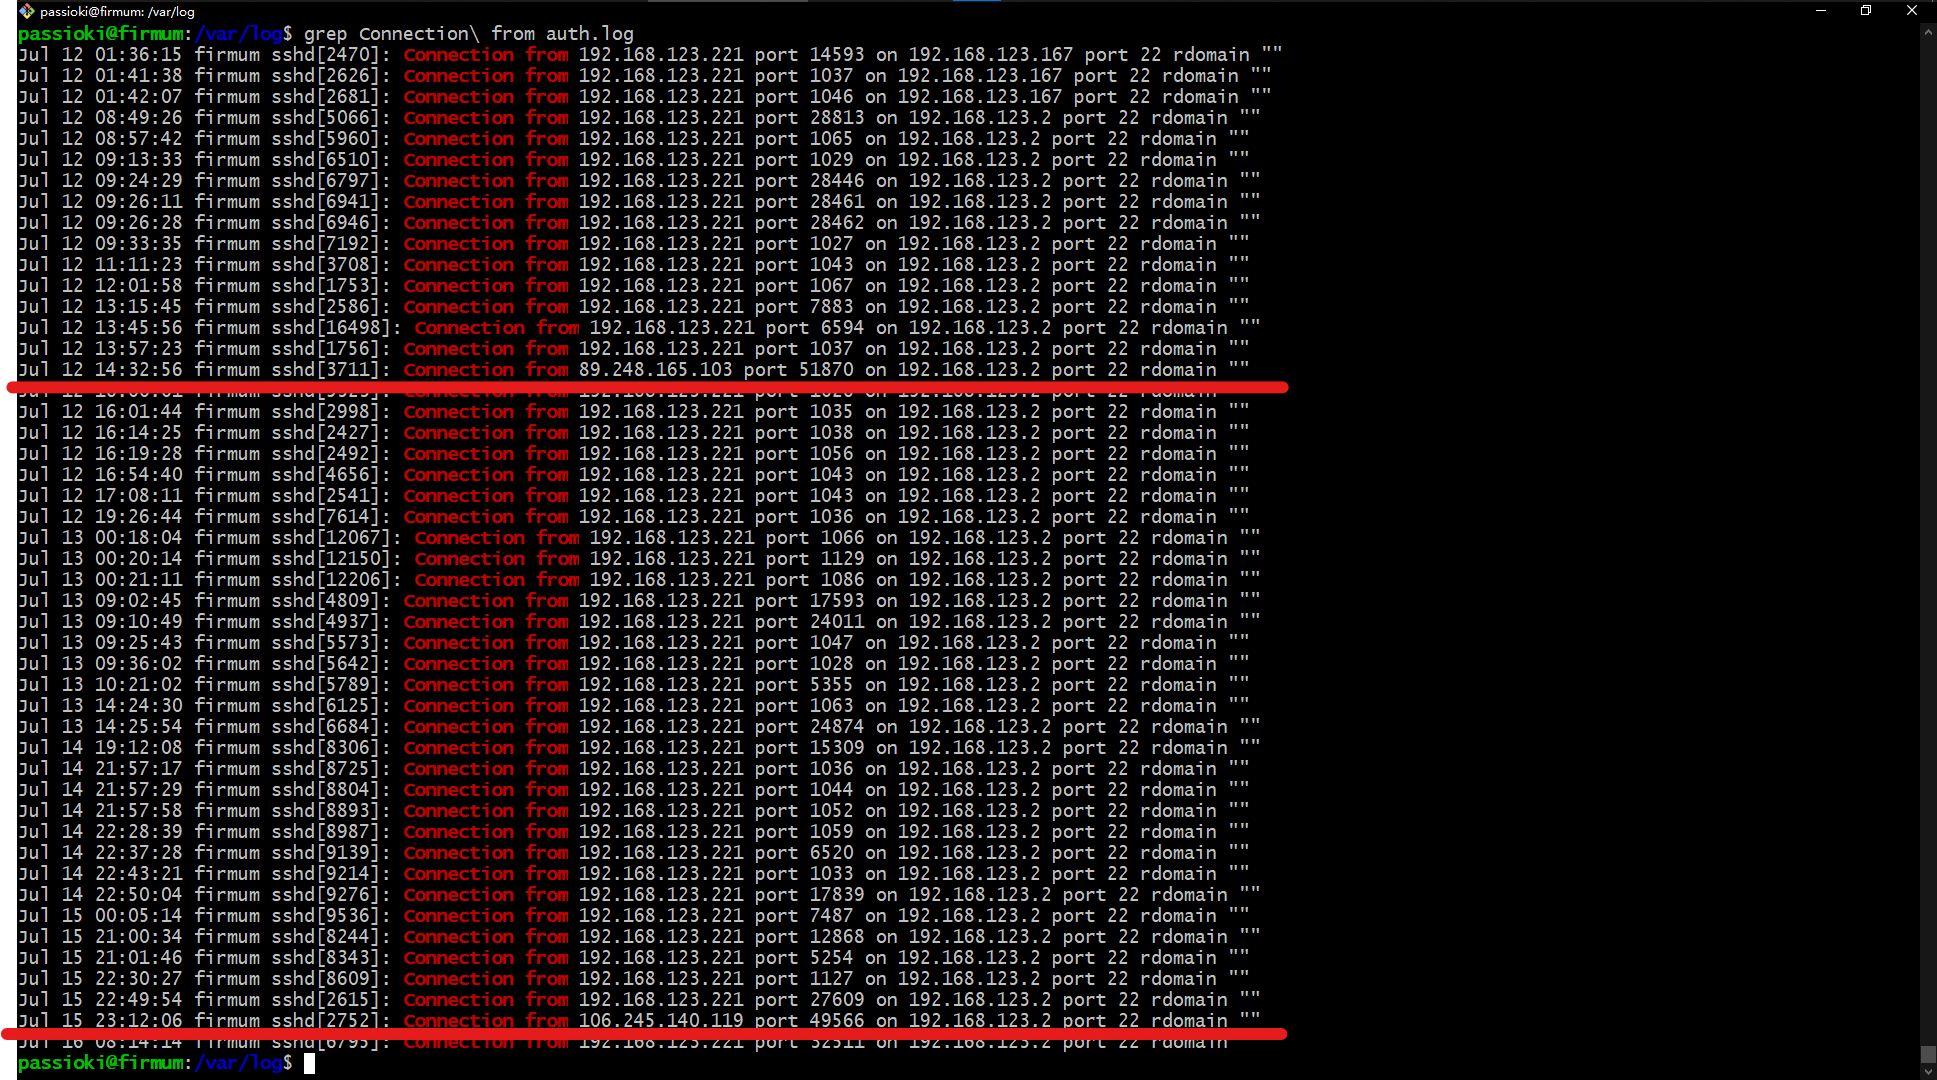
  记得之前刚建服务器的时候,前后流程走得太慢了,学一步走一步,导致从拷贝公钥到关闭密码登录之间的时间太长,然后端口也没更改,中间还去吃了顿饭,前前后后有四五个小时吧。后来整好后,看了下log,发现满屏都是尝试登录的,IP地址来源大部分是荷兰(Normal Shutdown, Thank you for playing [preauth]),自己登录的次数反而寥寥,有部分来自德国的,用户名竟然是拼音,这就过分了哈。

  以下仅为我的猜测,没有经实际验证过:从你的服务器暴露在公网开始,攻击就已经开始了,所以自建服务器,最好先在局域网设置好,比如把端口映射先关闭,或者直接暂时断开公网,然后将局域网内的电脑互相设置好,再开启端口映射,这样在设置期间是绝对安全的。

  如果时间允许,可以再整个fail2ban之类的软件,禁掉多次登录失败的IP,这里就不多展开了。